The practical starting point
Winter roof problems are not all the same. Water at an eave, frost in an attic, snow drifting against a taller wall and ice falling above a doorway need different responses. This guide explains the distinctions and gives Ohio owners a practical plan before, during and after winter—without turning roof access or snow removal into a DIY project.
Your project, our permitting team.
Ohio Roofing Co. confirms the requirements for your address, prepares and submits required roofing applications, and coordinates reviews and inspections. The office contacts, forms, and approval checklists in this guide explain the work we handle—not tasks you need to take on yourself. We explain fees and any owner authorization or property-specific consent needed. Approval decisions remain with the responsible authority.
What to keep in mind
- Prepare drainage and address known defects before persistent freezing weather.
- Investigate recurring ice and attic moisture as building-system problems.
- Never use snow depth alone to judge a roof’s load capacity.
- Assign safe observation, emergency contacts and spring follow-up in advance.
Plan for snow, wind, thaw and refreezing together
Ohio is not one uniform snow climate. Lake Erie influences conditions near its shore, and lake-effect snow is a particular consideration in northeastern Ohio. A Cincinnati owner should not borrow a snow assumption from the Cleveland area—or the reverse. Ask for property-specific criteria and a current forecast.
Ohio winter planning should cover changing conditions, not a single snowfall total. Wind can redistribute snow, a thaw can release water into drainage paths, and subsequent freezing can obstruct those paths. Use current National Weather Service information for the property, not a statewide average or an old forecast.
Building geometry matters. A lower addition beneath a taller wall, rooftop equipment, valleys and changes in elevation can create conditions unlike an unobstructed roof. An unheated detached garage and a heated house can also behave differently. Record roof areas separately instead of assuming one maintenance approach fits all of them.
Before the season, decide who can assess concerns, who can authorize work and who checks an unoccupied property. Winter is a poor time to discover that no one knows the roof’s history or how to reach the contractor.
Map winter exposure by roof area, not just by town
Start with a simple roof-area sketch and record where snow tends to remain, where meltwater appears and where people pass below. Roof shape, changes in elevation, nearby trees and adjacent buildings can make one part of a property behave differently from another. These observations do not establish structural capacity, but they help a professional understand the locations needing attention. Do not assume that two houses in the same Ohio town need the same snow-management or moisture-control plan.
Separate your observations into three categories: water entering the building, moisture forming within the assembly, and hazards associated with snow or ice outside. The categories can overlap, but each suggests a different assessment question. A recurring ceiling stain near an eave, frost reported at an attic access and falling ice above an entrance should not be grouped under one vague description of “winter roof trouble.” Record the timing and location so the assessor can investigate the relevant mechanism.
Consider how the building is used during winter. A normally occupied house, a seasonally vacant property, a rental with changing occupants and a business with moisture-producing activities may require different monitoring arrangements. Tell the professional about changes in occupancy, heating or ventilation, but do not assume those changes caused the problem without assessment. The owner’s contribution is an accurate timeline and access to the available records, not a diagnosis based solely on a single weather event.
Use the roof-area map to prioritize practical preparation. Identify which entrances require attention, where drainage problems have been reported and which temporary repairs remain. Mark any area that cannot be safely observed or accessed by ordinary occupants. Arrange qualified evaluation before prolonged severe conditions make investigation more difficult. A useful winter plan is specific enough that another household member or building manager can understand what to report and whom to contact without needing to climb onto the roof or interpret structural warning signs alone.
Complete the autumn roof and drainage review
Arrange a qualified assessment early enough to complete recommended repairs or agree on an interim plan. Give the contractor a record of leaks, prior ice-dam locations and rooms that felt unusually damp or cold. Ask for findings separated into immediate work, seasonal preparation and items to monitor.
Have gutters, downspouts, roof drains, scuppers and discharge points reviewed as appropriate for the building. A clean gutter is only one part of a functioning drainage path. Ask where water is supposed to go and whether the discharge arrangement creates an icy walkway or recurring problem at the building.
Roof access, tree work and equipment servicing should be done by appropriately qualified people. Your preparation task is to arrange the work, provide history and keep records—not to climb onto a wet roof for an autumn inspection.
- Resolve active leaks or obtain a written temporary-protection and follow-up plan.
- Have loose or damaged covering and flashing evaluated.
- Arrange appropriate drainage cleaning and check discharge locations.
- Record known ice, drift and snow-shedding trouble spots.
- Coordinate rooftop equipment and exhaust-vent concerns with the relevant trades.
- Confirm winter contact details, access rules and authority to approve work.
Prepare an autumn work order with clear deliverables
Before scheduling maintenance, gather last winter’s observations and any unresolved service reports. Ask the provider to evaluate the relevant roof areas, transitions and drainage features using methods appropriate to the building. Identify whether the visit is for cleaning, condition assessment, repair or several tasks. A generic “winterize roof” line item can conceal important differences in scope. The owner should know what will be inspected, what routine work is included and what findings require a separate proposal.
Ask for a brief written report identifying completed work, observed concerns and areas that could not be assessed. Photographs should locate the relevant detail rather than provide only close-ups. If the provider reports that a transition needs repair, ask whether it is an immediate water-entry issue, planned corrective work or something to monitor. This makes the autumn visit useful for budgeting and avoids treating every observation as either an emergency or a harmless cosmetic matter.
Coordinate tasks involving other trades. A rooftop exhaust concern, an equipment condensate problem or an electrical issue should be directed to the appropriate qualified provider. The roofer’s visit may identify the need for that coordination without including the other trade’s work. Assign each follow-up a responsible person and target date. An item noted in a report does not become corrected simply because the report was filed, and a property manager should not assume a tenant arranged it.
Before cold weather arrives, confirm emergency contact information and how occupants report renewed water entry. Store the report with warranty and maintenance instructions, and record the exact roof areas that were repaired. If recommended work is deferred, understand the limitation and establish a review plan rather than describing the building as fully prepared. This approach creates a specific, traceable autumn maintenance record while keeping owner observations and professional roof access appropriately separate. It also helps the next contractor understand what was actually done, rather than relying on the broad label of a seasonal service visit.
Understand how an ice dam differs from ordinary icicles
An ice dam can form when snow melts on a warmer part of the roof and water refreezes near a colder edge. That buildup can obstruct drainage, allowing water to back up beneath a covering intended to shed water downhill. Icicles can be a visible clue, but their presence alone does not establish the extent of hidden water entry.
Heat reaching the roof can come from air leakage and insulation weaknesses as well as the assembly’s design and conditions. The durable response is an investigation of heat, air and moisture control—not simply replacing the visible shingles or adding a heating accessory.
Record where the ice returns, what rooms or additions lie below, and which conditions preceded leakage. That history helps a professional distinguish a repeated building-system issue from an isolated drainage or flashing defect.
Follow the meltwater path before selecting a prevention measure
Ice-dam discussions are most useful when they connect where snow melts, where water moves and where it refreezes. A roof edge can be colder than areas receiving heat from the building, and roof geometry can concentrate water in particular locations. The owner should describe observed patterns without assuming that every icicle proves a failure or that the absence of visible ice rules one out. Ask the assessor to explain which conditions on this roof support its diagnosis.
Record whether the problem appears after extended snow cover, during a thaw or following a change in indoor use. Note which rooms and exterior edges are involved, using safe observations and earlier photographs where available. Mention prior insulation, air-sealing, ventilation or roof work. This history helps the professional compare possible mechanisms and identify whether the same symptom persisted despite earlier measures. Do not conduct your own destructive investigation or enter an attic whose condition or access is unsafe.
Ask the proposed prevention plan to distinguish the building-level correction from any roof-detail repair. Addressing unwanted heat or moisture movement can be a different scope from repairing a damaged flashing or interior finish. If several measures are proposed, ask what each is intended to accomplish and how they fit the existing assembly. A package of unrelated products is less informative than a coordinated explanation of the cause, the corrective work and the limits that remain.
Be particularly cautious with a recommendation presented as universally sufficient. A new vent, added insulation, heating cable or ice-protection product should not be treated as a guaranteed cure for every Ohio building. The appropriate response depends on the actual assembly, conditions and product requirements. Ask who designs and performs any electrical or mechanical work and how the result will be evaluated. Keep the permanent plan separate from immediate professional management of hazardous ice or active leakage, because solving the long-term mechanism does not automatically make a current hazard safe to ignore.
Ask for an attic strategy, not just “more ventilation”
Air sealing limits unwanted air movement, insulation slows heat flow, and ventilation manages airflow in an assembly designed to be vented. These are related but different functions. Adding insulation without addressing significant air leakage, or adding an exhaust vent without considering intake, can leave the underlying problem unresolved.
A conventional vented attic, a finished attic and an unvented roof assembly need different evaluation. Ask the professional to identify which system exists, how moisture is managed and whether planned changes remain compatible with that design. Do not assume the same retrofit is appropriate for every house.
The Department of Energy’s durable-attic guidance highlights air leakage, insulation and ventilation as connected concerns. For the owner, a useful deliverable is a written diagnosis and coordinated scope explaining which measures address which observations, including any needed mechanical or electrical work.
Ask for an attic assessment with boundaries and responsibilities
Before hiring separate trades, ask who will identify the existing attic or roof assembly and coordinate the recommendations. The location of the thermal boundary, the intended ventilation strategy and the condition of affected materials should be understood together. A homeowner should not be expected to combine disconnected advice into a building-science design. Request a plain-language explanation of the current arrangement, the suspected problem and how the proposed work changes the relevant air, heat or moisture pathways.
An assessment should distinguish accessible observations from concealed conditions. Ask what the provider can evaluate safely, which testing is proposed and what limitations affect the conclusions. Give the assessor the building history, including prior work and changes in use. Avoid interpreting a single thermal image or a small patch of visible frost as a complete diagnosis. Those observations may be useful, but they need context and an explanation of what additional evidence supports the recommended scope.
Coordinate electrical, combustion, exhaust and other systems with qualified professionals as applicable. Air sealing is not simply an instruction to fill every opening with a convenient material, and added insulation should not create conflicts with equipment or the intended assembly. The owner’s role is to request a coordinated plan and appropriate qualifications rather than improvising details from a general guide. Ask which trade is responsible for each part and how they will confirm that their work remains compatible with the rest of the building.
At completion, request a record of what areas were treated, what materials were used and which conditions remain outside the scope. Ask how future access or maintenance should avoid disturbing the work. Record the basis for any follow-up evaluation and compare later observations with the original condition log. Improvements in comfort or moisture behavior are useful to document, but do not attribute every utility-bill change to one measure. A clear before-and-after record supports future assessment while avoiding unsupported promises about savings or an assurance that winter moisture can never recur.
Distinguish condensation from an exterior roof leak
Cold-weather moisture does not always enter through the roof covering. Indoor moisture reaching cold surfaces can condense, and frost can later melt. That can resemble a leak even when it is not raining. Both mechanisms can occur in the same building.
Tell the assessor whether moisture appears during snowmelt, after a warm spell, during ordinary rain or after a change in indoor use. Mention bathroom or kitchen exhaust concerns, recent insulation work and any visible attic frost observed from a safe access point. Do not enter an unsafe attic to collect evidence.
Ask for a plan to address the moisture source and evaluate affected materials. Painting over a stain or replacing shingles without diagnosis may leave the cause active. If mold or significant water damage is present, follow qualified remediation guidance; EPA emphasizes correcting moisture rather than merely treating the visible surface.
| Pattern | Useful information for the assessor |
|---|---|
| Leak during snowmelt near an exterior wall | Ice location, roof transitions and whether the same area leaks in rain. |
| Frost or widespread dampness in an attic | Indoor moisture sources, air pathways and recent building changes. |
| Leak after wind-driven rain | Wind direction, affected rooms and wall or penetration locations. |
| Moisture around rooftop equipment | Equipment operation, condensate and recent service work. |
Build a moisture timeline that helps separate mechanisms
Use a calendar to record when moisture appears and what else was happening. Note outdoor conditions, indoor use changes, equipment service and whether the symptom occurs during rain, snowmelt or a dry cold spell. Record the location and visible extent without entering an unsafe space. The objective is to give the assessor a sequence of observations, not to prove a preferred explanation. A consistent timeline is often more useful than a dramatic photograph taken after the symptom has changed.
Distinguish what you observed from what somebody suggested. “Frost visible from the access opening” is different from “the roof needs more vents.” Keep the observation and proposed explanation in separate columns. If different contractors offer different diagnoses, ask what evidence supports each and which additional assessment would resolve the disagreement. Do not assume that installing new covering will correct a moisture problem whose source has not been established.
Consider interactions with the rest of the building. Bathroom and kitchen exhaust, equipment operation, indoor moisture sources and recent envelope work may be relevant to the assessment. Mention them without attempting to alter systems as an experiment. A qualified professional should determine the appropriate evaluation and corrective measures for the actual assembly. Generic advice about humidity or ventilation should not replace building-specific guidance when recurring condensation, damaged material or unusual conditions are present.
If affected materials need restoration, coordinate that work with correction of the moisture source. Cosmetic treatment can obscure evidence without resolving the underlying issue. Follow qualified remediation guidance where mold or significant water damage is involved, and keep occupants away from unsafe areas. Save the diagnosis and completed scope together so later moisture can be compared with the original mechanism. The goal is a traceable explanation of why the work was selected and what it addressed, not a claim that any stain appearing in winter must be either an ice dam or a failure of the roof covering.
Snow depth is not a roof-capacity calculation
The load depends on snow and ice characteristics, drifting, roof geometry, existing loads and structural condition. There is no responsible universal rule that a particular number of inches is safe for every Ohio roof. Do not use a weather alert threshold as an engineering limit.
FEMA identifies warning signs such as sagging roof or ceiling components, unusual cracking or popping, and doors or windows that suddenly become difficult to operate. If structural distress is suspected, evacuate the affected building and contact emergency services or the responsible building authority from a safe location.
Have a qualified structural professional determine the assessment and response where capacity is in question. Do not climb up to measure a drift or move snow around as an experiment. Removal can change how loads are distributed and requires a plan that protects the structure, workers and people below.
Make a snow-response plan before a capacity concern becomes urgent
Identify who can provide a qualified structural assessment if loading becomes a concern. Keep available drawings, building alterations and earlier reports accessible to that professional. Record major changes such as rooftop equipment or additions that may affect the evaluation, without attempting to calculate capacity yourself. A general snow forecast and the visible depth on the ground are not a substitute for an assessment of the actual roof, its geometry, accumulated material and structural condition.
For a commercial or shared property, assign responsibility for receiving reports and contacting the appropriate professionals. Establish an alternate contact so the process does not depend on one person being available. Occupants should know how to report unusual movement, noises, falling material or other concerns without entering hazardous areas. If structural distress is suspected, prioritize evacuation and emergency assistance rather than waiting for a routine maintenance provider or trying to complete a detailed inspection checklist.
Ask the qualified team how it will determine whether intervention is needed and how any removal will be planned. Snow distribution, access, equipment, concealed openings and the people below all matter. Owners should not direct untrained staff to move snow around or create piles as an experiment. Removal can introduce hazards and change loading patterns, so the procedure belongs to competent professionals using a plan suited to the building and current conditions.
After an event, retain the assessment, any authorized work and observations requiring follow-up. If a concern relates to the structure or drainage, do not assume it is resolved simply because the snow melts. Ask what further investigation or permanent correction is recommended when conditions permit. Update the response plan using what was learned, while avoiding a fixed “safe depth” rule inferred from one uneventful winter. The useful lesson is how the building was assessed and managed, not a claim that it can tolerate the same visible accumulation under every future combination of snow, ice, rain and temperature.
Make snow and ice management a professional plan
Before heavy weather, identify the contractor who can assess removal needs and explain safe access, removal sequence and disposal areas. Ask how the plan protects roof coverings, skylights, rooftop equipment and people at ground level. A building manager should not assign untrained employees to rooftop snow removal.
Metal and other steep roof surfaces can shed snow toward entrances, parking areas or lower roofs. If snow retention is proposed, request a system appropriate to the roof and site with manufacturer-supported design and attachment. Individual snow guards are not a universal accessory to place wherever they look convenient.
Keep people away from falling-snow and ice zones while maintaining safe emergency egress. If a route must close, coordinate an appropriate alternative with building staff. Do not pile removed snow where it blocks drainage, exits, equipment or access needed by responders.
Protect entrances and equipment without creating new hazards
Map the areas below roof edges where people walk, park, load materials or enter the building. Identify lower roofs, equipment and drainage paths that could be affected by falling snow or ice. This ground-level planning can be done without climbing onto the roof. Share the map with the qualified contractor and property manager so the response addresses people and operations, not only removal from the roof surface.
If snow retention is being considered, ask for a system designed and attached for the particular roof and conditions. Do not select individual devices solely from photographs or appearance. The responsible professional should explain the intended function, roof compatibility and any necessary coordination with the building structure or covering warranty. An owner should also understand maintenance and what the system does not guarantee. Snow retention is not permission to ignore hazardous conditions below the roof.
For removal work, ask how the provider will protect coverings, drains, skylights, equipment and people at ground level. Identify the exclusion areas and how safe access will be maintained. Coordinate any necessary route changes with the building’s responsible staff and authorities as appropriate. Do not block emergency exits or assume that a temporary barrier alone resolves every access requirement. The work plan should account for where removed material goes and how it affects drainage or essential services.
Keep documentation of the work and any reported damage or limitations. If a provider recommends further roof repair after removal, request the specific finding and proposed scope. Do not turn an emergency visit into an unexplained permanent upgrade. For recurring hazards, arrange a review of the underlying roof geometry, use and management plan when conditions are safer. This allows future prevention to be considered deliberately, rather than repeatedly improvising barriers or removal under pressure whenever the same entrance becomes hazardous during a thaw.
Prepare low-slope commercial roofs and occupied properties
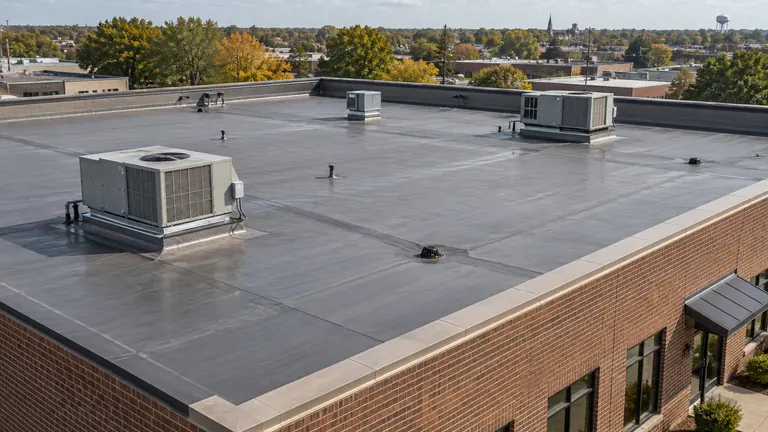
For a commercial roof, create a plan showing drains, overflow paths, rooftop equipment, access points and the rooms below. Identify who receives reports after hours and who can authorize an emergency response. A leak above sensitive inventory may require a different operations response from one in an unoccupied storage area.
Coordinate roof and mechanical contractors so drainage or equipment concerns are not passed between trades without resolution. Ask for written responsibilities around snow at curbs, blocked drainage and potential falling ice. Roof-access controls should apply to every visiting service contractor.
For rentals, seasonal homes and rural buildings, arrange interior checks by a responsible person when safe. Supply a simple reporting method: location, time, photos and any change since the last visit. A vacant building can develop a significant moisture problem before anyone notices a ceiling stain.
A winter operating plan for rentals, farms and commercial buildings
Assign one point of contact for reports, one person authorized to approve work and an alternate for each role. Those may be the same person in a small property, but the responsibilities should still be clear. Provide occupants with a simple reporting method that asks for the location, time and safely observed condition. Employees and tenants should not be expected to diagnose roof problems or gain roof access before a report is taken seriously.
Identify spaces where water entry or lost access would cause disproportionate disruption. These may include electrical rooms, stored goods, customer entrances, production areas or animal housing. Ask the facilities team and qualified providers to plan appropriate protection and response for those spaces. Keep building safety and operating decisions separate from a desire to avoid interruption. If a condition makes occupancy unsafe, the response must follow appropriate emergency and professional guidance rather than treating continued operation as the overriding objective.
Coordinate rooftop equipment service with the roof-maintenance plan. Record who may access the roof, how hazards are communicated and who checks for damage after service. Condensate, exhaust and equipment-related issues may require another trade. A roofer’s report should identify the concern without leaving the owner to assume it was repaired during an unrelated visit. Use a work-order log to track each item through actual completion.
For vacant or intermittently used buildings, establish an observation and response arrangement appropriate to the property. Do not assume that an unoccupied building can be left without attention simply because nobody sees a leak. Keep access information, emergency contacts and available roof records current. On farms, describe the use of each building separately when seeking advice or discussing insurance. A household garage, an animal building and a business storage structure can have different operating and policy considerations, so the plan should not treat every roof on the parcel as one interchangeable asset.
Understand what changes when roof work happens in winter
Winter does not automatically make all roofing work impossible, but conditions can change product handling, attachment, adhesion, sealing and safe access. Ask the contractor to explain the exact product’s requirements and the plan for the actual site. A general temperature rule is not a substitute for manufacturer instructions.
Discuss whether the appropriate scope is a permanent repair, temporary protection or investigation followed by work in a better window. Record the limits of any temporary measure and who maintains it. Weather delays should have a communication and protection plan rather than leaving the owner to guess.
Our team handles permit checks, required applications and inspection coordination for winter roofing work too. If concealed deterioration expands an emergency repair, we coordinate the office, required designer and revised application before affected work is hidden. You do not have to navigate a separate winter permit process yourself.
Decide whether the immediate scope is investigation, protection or permanent repair
Ask the contractor to explain which of three tasks is appropriate now: investigating the cause, providing temporary protection or completing a permanent repair. Weather, access, product requirements and the condition of the assembly can affect that decision. The owner should understand why the proposed task fits current conditions and what remains for later. A winter visit should not be described as permanent correction when it only reduces immediate exposure pending a fuller assessment.
For permanent work, request the product-specific approach and the plan for preparing and protecting the work area. Avoid prescribing a universal installation temperature or method from an online article. Different materials and conditions require different handling. Ask how the contractor will confirm that the proposed work meets the applicable instructions and requirements, and what happens if conditions change during the scheduled window.
For temporary work, record its purpose, expected limitations, monitoring responsibility and follow-up date or trigger. Ask whether the price includes a return visit and how renewed water entry should be reported. The owner should not assume temporary protection will remain effective indefinitely or that the first provider is automatically hired for the eventual replacement. Keep authorization and payment terms clear, particularly when the visit occurs during an urgent leak.
When weather improves, our team revisits the symptoms and temporary work as one coordinated scope. We confirm whether the diagnosis has changed, handle permit application revisions required by expanded work and coordinate other trades. We provide final documentation and track outstanding roofing inspection and approval items so you do not have to chase the office yourself. This approach prevents a winter emergency measure from becoming an undocumented long-term condition, while allowing the permanent decision to be made when the contractor can evaluate the building appropriately and explain the proposed correction with better evidence.
Respond to a winter leak without creating another hazard
Keep people away from bulging ceilings, damaged electrical equipment and areas that may be unstable. If danger is suspected, leave and call for appropriate emergency assistance. Do not puncture a ceiling, enter a damaged roof space or climb outside to chase the leak.
From a safe location, record the time, room, visible extent and weather conditions. Contact the roofing professional and, where relevant, the property manager and insurer. Ask what documentation is needed and what qualified protection or restoration steps are appropriate.
Track temporary action and the permanent diagnosis separately. If the leak stops when temperatures change, that does not establish that the problem has been corrected. Put the follow-up assessment on the calendar and retain photos of the original condition.
Close the loop after the thaw
Once conditions permit safe assessment, review every winter observation and temporary repair. Ask whether flashings, covering, drainage or interior materials need further work. Compare the findings with the autumn baseline and keep the report with your roof records.
Separate symptom treatment from prevention. A repaired leak and a plan to address recurring ice or condensation may be two different scopes. We explain each work item and coordinate any additional trades and roofing approvals needed, guiding you if an owner signature or property document is required.
Use the following calendar as an owner’s organizational tool. Adjust it to the manufacturer’s maintenance instructions, building use and actual weather; it is not a requirement for owners to access the roof.
| When | Owner’s priority |
|---|---|
| Before winter | Arrange qualified review, complete priority repairs, prepare drainage and contacts. |
| Ahead of significant weather | Review official warnings, access restrictions and the emergency communication plan. |
| After an event, when safe | Record changes from safe locations and request professional assessment when warranted. |
| During a thaw | Watch for new indoor symptoms and report recurring drainage or ice problems. |
| Spring | Assess deferred work, resolve underlying causes and update the maintenance record. |
Use the spring review to improve the next winter’s plan
Bring the autumn report, winter observation log and emergency-work records to the spring assessment. Ask the provider to distinguish new damage, recurring defects and conditions that remain uncertain. The purpose is not to assume every visible change was caused by winter. It is to compare the current findings with the baseline and identify which issues require repair, further investigation or continued monitoring. Label roof areas consistently so the record remains understandable over several seasons.
Review temporary measures first. Ask what must be removed, replaced or incorporated into a permanent repair and whether any related interior restoration remains. If the symptom stopped during a thaw or after temperatures rose, do not take that alone as evidence that the underlying cause is gone. The follow-up should connect the observed seasonal pattern to the diagnosis and explain which correction is recommended.
Separate maintenance from longer-term improvements. Cleaning or repairing a drainage component may be a routine task; changing an attic strategy, snow-retention arrangement or roof geometry may require a broader assessment. Ask for clearly separated scopes and priorities so the owner can plan expenditure without turning every seasonal observation into a complete replacement proposal. Our team coordinates qualified designers, equipment trades and the responsible office where the proposed roofing work calls for them, including required applications and inspection arrangements.
At the annual planning meeting, update contacts, access arrangements and the list of unresolved conditions. Record which measures were completed and which were deferred, with reasons and a review plan. If the property changes ownership or management, transfer the winter history along with warranty documents. The next person should not have to rediscover a recurring leak or hazard from scratch. A good maintenance record turns winter experience into better decisions, while keeping uncertainty visible and avoiding guarantees that one repair, product or season of successful performance settles every future roof concern.
Common questions
How much snow is too much for my Ohio roof?
There is no universal safe depth. Snow density, drifting, roof shape, existing loads and structural condition matter. Use a qualified structural assessment when capacity is uncertain, and leave the building if distress is suspected.
Are icicles proof that I need a replacement roof?
No. They can prompt investigation of meltwater, drainage and heat movement, but they do not diagnose the entire roof. Record recurring locations and leakage and ask for an assessment of the building assembly.
Will heating cables prevent every ice dam?
No accessory is a universal solution. Ask a qualified professional whether a listed, properly designed system is appropriate and what underlying air, insulation or drainage issues still need correction. Electrical installation and maintenance need their own plan.
Can I use salt, a torch or a pressure washer to clear roof ice?
Do not improvise roof-ice removal. These approaches can create injury, fire, electrical or material-damage hazards. Keep clear of falling ice and arrange qualified assessment and safe removal when needed.
Why does my roof leak only when snow melts?
Possible causes include backed-up meltwater, a roof detail that behaves differently under snow cover, or condensation and frost thawing inside the assembly. A professional needs the symptom history and building condition to distinguish them.
Does winter damage automatically mean insurance coverage?
No. Coverage depends on the policy and facts of the loss. Report observations accurately, document protective work and ask the insurer about obligations and coverage. A maintenance or construction recommendation does not determine the settlement.
Sources & editorial notes
Resources checked September 9, 2026. Rules and linked documents can change; our team confirms current requirements with the responsible office for your project. Ohio Roofing Co. editorial prepared this owner-focused guide using government and industry resources. It is not an engineer-reviewed design, legal opinion, insurance determination or permit approval. Examples and worksheets are planning aids, not customer projects or price estimates.
- NOAA: Ohio climate and regional snowfall context
- NWS Cleveland: winter weather information
- FEMA: snow-load safety guide
- National Weather Service: roof ice-dam formation and prevention
- DOE: consumer guide to durable attics
- DOE: professional air-sealing assessment and safety coordination
- EPA: moisture control and mold cleanup guidance
- FEMA: snow-load warning signs and emergency guidance
- IBHS: commercial winter-weather planning and snow retention